Secure Consul
For security reasons, SEAL Systems strongly recommends configuring the TLS encryption.
Caution - firewall
SEAL Systems strongly recommends protecting Consul via firewall. Otherwise everyone who may access the Consul Web interface via port 8500 can change the configuration including the user authorization. Only the SEAL Operator servers and maybe the workstations of the system administrators should have access to Consul.
Configure the TLS Encryption
The connection to Consul is secured by the TLS certificate located in the %PROGRAMDATA%\SEAL Systems\config\tls directory. After you have replaced the self-signed certificate enclosed in delivery by your own certificate in Secure the SEAL Operator Services, seal-consul-agent does not pick up the new certificate on its own.
Restart the following service:
seal-consul-agent
Specify a CA Certificate
In most cases, you do not need to specify a CA certificate. A CA certificate does not make Consul require client certificates from the SEAL Operator services. Consul verifies client certificates only if verify_incoming is set to true in the Consul configuration file.
With verify_outgoing, Consul requires TLS for its outgoing connections and uses the CA certificate to verify them.
This is how you configure a CA certificate with Consul:
-
Open the Consul configuration file:
%PROGRAMDATA%\SEAL Systems\config\consul.json -
Insert the following lines in the first level, for example, after the first opening bracket:
{
  "ca_file": "C:\\ProgramData\\SEAL Systems\\config\\tls\\ca.pem",
  "verify_outgoing": true,
...
}
Caution - JSON structure
Pay attention to keep the JSON structure in the Consul configuration file! For further information, refer to https://www.json.org/json-en.html.
-
Save the configuration file.
-
Restart the following service:
seal-consul-agent
Configure ACL
Consul comes without ACL configuration. ACL stands for access control list. This is how you configure ACL:
-
Stop SEAL Operator. In a cluster, do this on every server.
-
Open the Consul configuration file on the SEAL Operator server. In a cluster, do this on every server:
%PROGRAMDATA%\SEAL Systems\config\consul.json -
Insert the following lines in the first level, for example, after the first opening bracket. In a cluster, do this on every server:
{ "acl": { "enabled": true, "default_policy": "deny", "enable_token_persistence": true }, ... } -
Start the following service. In a cluster, do this on every server:
seal-consul-agent
-
Open a Command Prompt as administrator and change to the directory of the Consul program. In a cluster, do this only on one server:
cd C:\Program Files\SEAL Systems\seal-consul-agent -
Set the following environment variables. In a cluster, do this only on one server:
set CONSUL_HTTP_SSL=true set CONSUL_HTTP_SSL_VERIFY=false -
Execute ACL bootstrap. In a cluster, do this only on one server:
.\consul.exe acl bootstrapThis results in an output like this:
AccessorID: <bootstrap_accessor_id> SecretID: <bootstrap_secret_id> Description: Bootstrap Token (Global Management) Local: false Create Time: 2022-01-18 14:33:38.1674571 +0100 CET Policies: 00000000-0000-0000-0000-000000000001 - global-management -
Open the Consul user interface, change to the
ACLtab and enter theSecretIDfrom the bootstrap result. In the example above, this is<bootstrap_secret_id>. In a cluster, do this only on one server: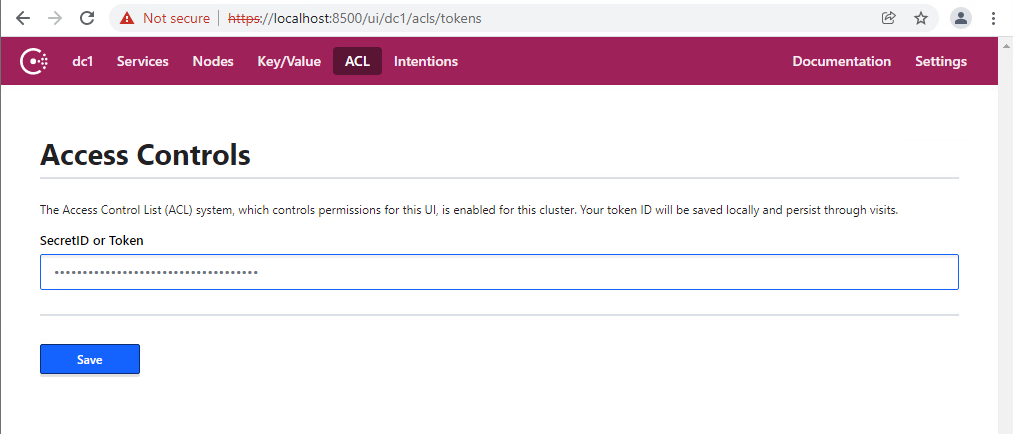
-
Change to the
Key/Valuetab and specify theSecretIDfrom the bootstrap result at thedc/home/env/service/any/tag/any/CONSUL_TOKENkey. In the example above, this is<bootstrap_secret_id>. In a cluster, do this only on one server: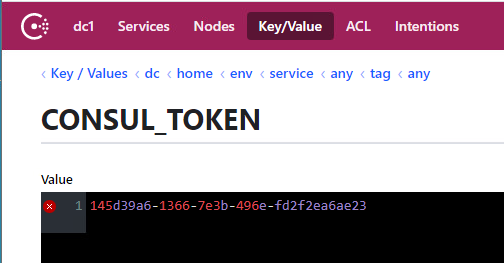
-
Open the envconsul configuration file on the SEAL Operator server. In a cluster, do this on every server:
%PROGRAMDATA%\SEAL Systems\config\envconsul.json -
Change the value of
consul.tokento theSecretIDfrom the bootstrap result. In the example above, this is<bootstrap_secret_id>. In a cluster, do this on every server:{ "consul": { "address": "127.0.0.1:8500", "ssl": { "enabled": true, "verify": false }, "token": "<bootstrap_secret_id>", "retry": { "attempts": 0 } }, "sanitize": true, "upcase": true, "vault": { "renew_token": false }, "kill_signal": "SIGTERM" } -
Stop the following service. In a cluster, do this on every server:
seal-consul-agent
-
Start SEAL Operator. In a cluster, do this on every server.
-
To enable the services to make DNS requests create the
dns-request-policy.hclfile in an arbitrary directory with the following content. In a cluster, do this only on one server:node_prefix "" { policy = "read" } service_prefix "" { policy = "read" } query_prefix "" { policy = "read" } -
Execute the following command to create the policy for DNS requests. In a cluster, do this only on one server:
.\consul.exe acl policy create -name "dns-requests" -rules @<arbitrary directory>\dns-request-policy.hcl -token <bootstrap_secret_id>This results in an output like this:
ID: <dns_policy_id> Name: dns-requests Description: Datacenters: Rules: node_prefix "" { policy = "read" } service_prefix "" { policy = "read" } query_prefix "" { policy = "read" } -
Execute the following command to create the token for DNS requests. In a cluster, do this only on one server:
.\consul.exe acl token create -description "Token for DNS Requests" -policy-name dns-requests -token <bootstrap_secret_id>This results in an output like this:
AccessorID: <dns_token_accessor_id> SecretID: <dns_token_secret_id> Description: Token for DNS Requests Local: false Create Time: 2022-01-31 14:08:31.5254338 +0100 CET Policies: <dns_policy_id> - dns-requests -
Execute the following command to apply the created token. In the example above, this is
<dns_token_secret_id>. In a cluster, do this only on one server:.\consul.exe acl set-agent-token -token <bootstrap_secret_id> default "<dns_token_secret_id>"This results in an output like this:
ACL token "default" set successfully


Next Step
Continue with: Change the Token for Encrypting the Credentials